Key Takeaways
- Calories per ounce decides your food weight. Aim for 100 cal/oz as a working minimum and 125 as a target, which cuts about 2.5 pounds over a five-day trip.
- Fat does the heavy lifting. At nine calories per gram against four for protein and carbohydrates, a few tablespoons of olive oil beat a pound of fresh vegetables.
- Cold soaking replaces a stove, fuel canister, pot, and spoon, cutting 10 to 16 ounces of extra weight. A sealed wide-mouth bottle does the job on its own.
- Homemade meals cost about a dollar each against $10 to $15 for a freeze-dried pouch, and you control the sodium and the ingredients.
Food is usually the heaviest thing in an ultralite pack, and it’s often the piece of the plan that gets the least forethought. Many of us will spend months researching a tent that saves eight ounces, then buy five days of groceries in 20 minutes. You feel that decision about a mile up the trail, when the pounds you didn’t think about outweigh the ounces you did.
We get it. Nobody starts backpacking because they love meal prep. Luckily, an ultralite food plan comes down to basic arithmetic. Choose food by calories per ounce, get it out of the packaging it came in, and decide honestly whether you need a stove.
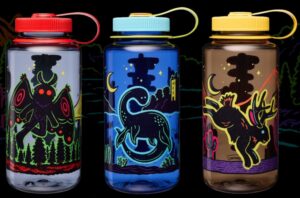
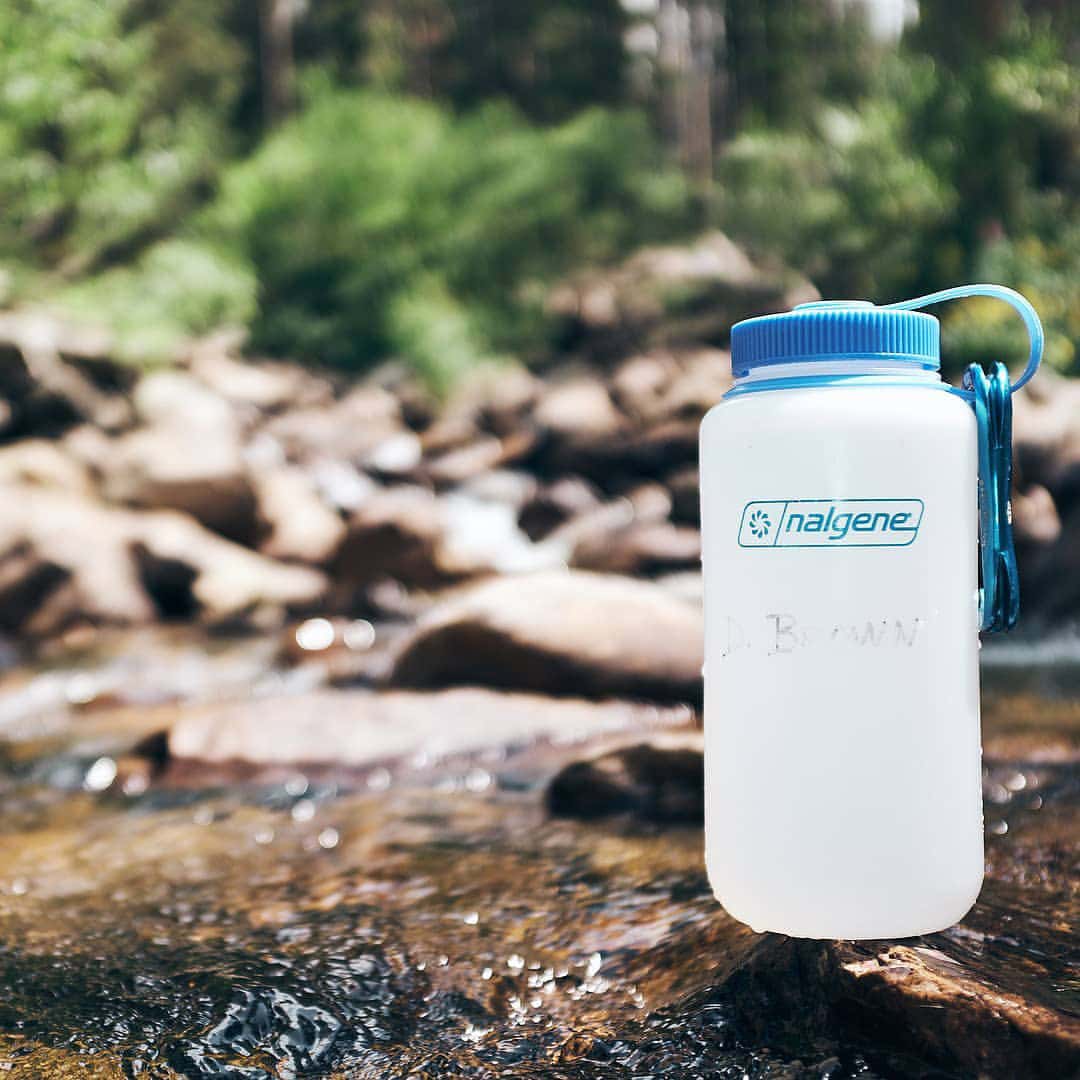
Answer no to that last one and your water bottle can pick up most of the slack. A wide-mouth Nalgene can cover multiple bases, enabling you to measure ingredients on the counter at home, soak dinner while you hike, and double as the bowl you eat out of. Here’s how to build a food bag that weighs less and still feeds you, starting with the one number that decides everything else.
What Makes a Camping Meal Ultralite?
A meal earns the ultralite label when it does three things:
- It carries a lot of calories for its weight
- It takes little or no cooking
- It comes with almost no packaging
Miss the mark on any one of those and you’re carrying something you don’t need, whether that’s water still sitting in the food, the stove it takes to heat it, or a cardboard box.
The first one is where most of the savings come from, and it comes down to a single number: calories per ounce.
Plan on 100 calories per ounce as your working minimum and 125 as a good target. That sounds like a small difference until you do the math. For example, a 3,500-calorie day at 100 calories per ounce weighs 35 ounces. The same day at 125 weighs 28. Across five days, that’s two and a half pounds off your back, and you’re eating exactly the same amount of calories either way.
Fat is what gets you to the higher number. Gram for gram, fat provides nine calories compared to four for protein and carbohydrates, which is why a few tablespoons of olive oil do more for your daily total than a pound of fresh vegetables. Once you know that, you can walk a grocery aisle and estimate calorie density without even reading a label.
Approximate calorie density of common trail foods:
| Food Item | Calories Per Ounce |
| Olive oil | 250 |
| Peanut butter | 165 |
| Nuts and seeds | 160–180 |
| Chocolate | 150 |
| Hard cheese and cured salami | 110–130 |
| Fresh fruit and vegetables | 15–30 |
Fresh produce is an obvious casualty. Plenty of us still bring an apple on a two-nighter, because an apple on day one is worth the ounces. Plus, it gets harder to justify on longer excursions.
Stove or no stove?
A stove, a 100-gram canister of isobutane fuel, a pot, and a spoon add 10 to 16 ounces, and that’s before a single calorie goes in. Whether that’s worth carrying depends on how you want to eat at the end of the day. There are three ways to go about it:
- Carry the stove. The most flexible option and the heaviest. You get hot dinners, hot drinks, and the full range of ingredients, including the cream and cheese sauces that never work cold. For a lot of us, the whole decision comes down to coffee in the morning, and that’s a fair reason to bring one.
- Go stoveless and cold soak. Dry food goes into a sealed container with enough cold water to just cover it, and that measurement is the part you need to get right because there’s no boiling off the extra later. Guess dry if you have to guess. Seal it and let it sit. The food softens enough to eat in 20 to 30 minutes, but an hour or two gets you a better result, with the grains fully rehydrated instead of crunchy in the middle. That’s why most people mix dinner at lunch and let it soak in the pack all afternoon, so it’s ready when they drop their pack at camp. The container is the only gear this method needs, and a wide-mouth bottle easily handles it. The graduations measure the water, the seal keeps dinner out of your sleeping bag, and the mouth is wide enough to eat from with a long spoon.
- Split the difference with quick-cook food. Couscous, instant rice, ramen, and potato flakes only need enough hot water to rehydrate them, so you bring the water to a boil, pour it over the food, and let it sit. Nothing simmers on the stove, which is where most of the fuel gets used. You still carry the stove and the pot, but one small canister goes a long way. One boil handles a meal, and a 100-gram fuel canister covers roughly five days for two people at one boil in the morning and one at night.
Cold soaking is the lightest of the three by a wide margin, though it stops working below freezing. Winter trips call for a stove.
How to Build an Ultralite Backpacking Menu
Calorie density tells you what to buy, but it doesn’t tell you how much to take with you. Building the menu is where you decide how many ounces go in the bag, what they turn into at camp, and whether you’ll still want to eat them on day nine.
Calculate the total first
There are two ways to get the amount wrong, and you often find out about both of them when it’s too late to fix them.
Pack too little and day four turns into rationing, which is miserable in a specific way. Pack too much and you carry the surplus every step of the trip, then unpack it at home still sealed. Somewhere in there is the right number, and it’s easier to find than most people expect.
- Start with what you’ll burn. A moderate day, call it 8 to 12 miles over reasonable terrain, burns 3,000 to 4,000 calories. Longer days in the 20 to 30 mile range push that to 5,000 or 6,000 calories. Cold weather also raises it, since your body spends energy staying warm, and so does a heavy pack, since you’re doing more work per mile.
- Pick a number, multiply it by the number of days you’ll be out, and you have your total calories. Divide that by your calorie density target and you get ounces. At 3,500 calories a day and 125 calories per ounce, that’s 28 ounces of food per day, or about a pound and three quarters. Standard planning guidance lands between one and a half and two pounds per person per day, so if your math lands well outside that, check it again.
One thing the arithmetic won’t tell you is that your appetite changes as the trip goes on. Hikers call it hiker hunger, and it usually shows up in the second or third week of a long trip. Your body works out that the calorie deficit isn’t temporary and turns the volume up. A menu that felt generous when you packed it stops being enough somewhere around day 15. On anything longer than 10 days, add food to the back end rather than spreading it evenly.
Before you leave, put the whole food bag on a kitchen scale. If it comes in heavier than your calculation, something got past you, usually a box you forgot to open or a snack you packed twice.
One more thing the food math leaves out. Rehydrated meals drink your water. Dinner takes a cup and a half to two cups, breakfast about a cup, coffee another 8 to 10 ounces, which adds close to an extra liter a day on top of what you’re drinking. That’s fine next to a creek and a real problem at a dry camp, so check where the water is before you decide what’s for dinner.
Fill the meal categories
Once you have the total, the next step is splitting it across breakfast, lunch, snacks, and dinner.
Snacks usually account for more of the day than any single meal. That’s because after a few days out, most hikers stop taking a real lunch break. Sitting down means cooling off, stiffening up, and losing 20 minutes, so you end up eating while you walk instead. A handful of nuts on an uphill, a bar at a water crossing, jerky when a view gives you a reason to stop. By the time you drop your pack at camp, you’ve eaten most of the day standing up.
Plan for that rather than fighting it. A lunch that requires assembly tends to stay in the pack, and food you can reach without taking your pack off gets eaten.
Prioritize ingredients that do more than one job
The most efficient food bags have fewer ingredients in them than you’d think, because the same bags show up in multiple meals.
Powdered milk is the clearest example. It goes in your coffee, thickens your oatmeal, turns instant mashed potatoes into something closer to real mashed potatoes, and makes a pasta sauce when you add it to a bit of butter powder. One bag, four jobs, and you’re not carrying creamer and a separate dairy component for dinner.
The same logic applies across the bag:
- Peanut butter powder mixes into oats, becomes a peanut sauce for noodles when you add water and hot sauce, and works straight off a spoon in the afternoon
- Coconut milk powder is a curry base at dinner and a coffee creamer in the morning
- Olive oil adds calories to any dinner and dresses a cold-soaked lunch
- Instant potato flakes are a dinner on their own and a thickener when a soup comes out too thin
None of this is about eating less. It’s about the same food showing up in more places.
Pack for flavor
Two weeks in, you’ll be hungry and staring at a bag of food you don’t want to open. Nothing’s wrong with the food. You’re still burning 4,000 calories a day, and you still need it. You just eat slower, leave a little in the bottle, and quietly slip into a deficit you can’t afford. Ask anyone coming off a long trail and they’ll tell you about this before they tell you about pack weight.
The fix weighs in at under an ounce. Salt, pepper, chili flakes, a few bouillon cubes, and a small bottle of hot sauce will change every dinner they touch, and the condiment packets you pocket in town are free. Instant coffee earns its place here too, since a hot cup on a cold morning does more for a day than anything else that light.
Build in variety at home, when you have the whole spice cabinet in front of you and you’re not exhausted. It’s not a decision you can make on the trail.
Repackaging
Packaging barely registers on a scale. What it costs you is space, and space is the thing you run out of first.
Pick up a box of mac and cheese and you’ll notice it weighs almost nothing. That’s exactly why it stays in the pack. Nobody looks at a cardboard box and thinks of it as a problem, because on a scale it barely registers. Open it up, though, and you’ll find the pouch inside takes up maybe half the room the box does. The rest is air, held in shape by cardboard you’ll be carrying for five days and throwing away at the end.
Multiply that by four dinners, a few breakfasts, and a box of drink mix, and you’ve given up a serious amount of room in a pack that has a fixed amount of it. At some point you’re standing over a half-packed bag deciding what gets left behind, and it’s rarely the cardboard that loses.
The fix takes about ten minutes at the kitchen table. Open every box, pull the pouch or the contents out, and move everything into resealable bags. Squeeze the air out as you seal them and the same food will take up half the space it did. While you’ve still got the box in your hand, copy the cook time onto the bag with a permanent marker.
All of this becomes non-negotiable if you’re headed somewhere a bear-resistant food container is required. Those have a hard volume limit, and everything scented has to fit inside, food and toothpaste alike. Five days of food will just barely go in when it’s bagged, and it won’t go in at all if half of it is still in boxes.
Measuring and portioning
The whole point of measuring at home is that you only have to think about it once.
Buying in bulk is what makes homemade trail food cheap, but it leaves you with a two-pound bag of couscous and no idea how much of it is one dinner. Guess low and you’re hungry at camp with the rest of the bag sitting in your kitchen. Guess high and you carry food you never eat, which is the same as carrying rocks. Either way you find out days later, miles from anywhere, with nothing you can do about it.
So you sort it out on the counter instead. A wide-mouth bottle works as the measuring cup, since the ounce and milliliter graduations are printed right on the side. Pour couscous in until it reaches the line you want, tip it into the meal bag, and repeat. Do the same with oats, instant rice, powdered milk, and anything else that comes out of a bulk bin. Nothing else gets dirty, which is the part that keeps you from cutting corners after the third meal.
The real payoff is consistency. Measured the same way every time, day one’s dinner is the same size as day five’s. Eyeball it instead and the portions drift, usually generous at the start when you’re excited and thin at the end when you’re hungriest. Nobody wants to discover on the last night that they’ve been eating tomorrow’s food since Tuesday.
Spices and powdered milk are the exception to the bag rule. Fine powders find their way through a ziplock seam eventually, and then everything in your food sack tastes faintly of chili. Those go in leak-proof storage containers instead, which come in sizes from 4 oz to 48 oz. The small ones hold a trip’s worth of salt, pepper, and chili flakes without giving anything up to the rest of your food.
Easy Ultralite Camping Meal Ideas
Almost every ultralite meal includes the same four things:
- A dried carbohydrate base
- A protein
- A fat
- A flavor boost
Once you see the pattern you can build dinners out of whatever the grocery store has.
Here’s what one of those dinners actually looks like from start to finish.
At lunchtime, you stop long enough to open your food bag and tip into a 32oz wide mouth bottle, a serving of couscous, a drizzle of olive oil, and a crumbled bouillon cube. Add cold water until the food is just covered. Screw the lid down, put the bottle back in your pack, and keep walking. It rides there all afternoon, sloshing quietly, doing its work while you climb.
Five or six miles later you drop your pack at camp. The couscous has absorbed everything and the bouillon has turned it into an actual dinner. Stir in a foil packet of chicken now rather than at lunch, since meat that sits in warm water all afternoon is asking for trouble. The mouth is wide enough for a long-handled spoon, so you can eat straight out of the bottle. Cleanup involves a splash of water and a hard shake.
Hot food runs the same play in reverse, though this is where the bottle matters. Tritan is heat safe, so boiling water goes straight into a Tritan Wide Mouth for oatmeal, coffee, or a hot dinner. Slide an insulated bottle sleeve over it and the heat stays in while the meal rehydrates, which is the same thing a pot cozy does without the pot cozy. When you’re done eating, refill it with hot water and put it in the foot of your sleeping bag. It’ll keep your feet warm most of the night.
These are the combinations that hold up trip after trip:
| Category | Meal | Method | Time |
| Breakfast | Oats with powdered milk, dried fruit, and nut butter | Cold soak | Overnight |
| Breakfast | Instant oatmeal with peanut butter powder and brown sugar | Hot water | 3 to 5 minutes |
| Breakfast | Coconut chia pudding | Cold soak | 30 minutes or overnight |
| Lunch | Dehydrated hummus with crackers or a tortilla | Cold soak | 15 to 20 minutes |
| Lunch | Chicken or tuna salad with mayo packets | Cold soak | 10 minutes |
| Lunch | Tortilla with hard cheese and cured salami | No prep | None |
| Dinner | Couscous with olive oil, bouillon, and freeze-dried vegetables | Cold soak or hot water | 15 to 20 minutes |
| Dinner | Instant mashed potatoes with bacon bits and powdered butter | Hot water | 5 minutes |
| Dinner | Refried bean flakes over instant rice, burrito-bowl style | Cold soak | 20 minutes |
| Dinner | Ramen with dried shiitakes and a chicken packet | Hot water | 5 minutes |
| Snacks | Trail mix, nut butter packets, jerky, dried fruit, and chocolate | No prep | None |
Put together, three days looks something like this.
| Meal Category | Day 1 | Day 2 | Day 3 |
| Breakfast | Granola with powdered milk and dried mango | Instant oatmeal, peanut butter powder, brown sugar | Coconut chia pudding, soaked overnight |
| Snacks | Trail mix, honey stinger waffle | Almonds, fruit leather, chocolate | Jerky, corn nuts, peanut M&Ms |
| Lunch | Tortilla with salami and hard cheese | Dehydrated hummus with crackers | Chicken salad with mayo packets |
| Dinner | Couscous with olive oil, bouillon, freeze-dried vegetables | Instant mashed potatoes with bacon bits | Refried bean flakes over instant rice |
That’s about 28 oz of food per day, which lands right in the range from the math above.
A few things won’t cold soak no matter how long you leave them:
- Regular dry pasta stays chalky in the center.
- Brown rice is a lost cause even when the bag says instant, since the bran layer keeps water out.
- Whole beans and lentils need real heat to soften.
- Cream and cheese sauces separate into something grainy and greasy that’s hard to finish.
Test anything new at home before you commit to it for five days out in the elements.
DIY “Just Add Water” Backpacking Meals
Every meal in that chart can also be bought ready-made. Freeze-dried pouches go for $10 to $15 each and one pouch is a dinner for a hungry hiker, so five nights out is $50 to $75 in dinners before you’ve bought a single snack. Making your own brings it down to about a dollar per meal.
Cost isn’t the only reason people switch. Commercial meals are heavy on sodium and light on choice, and if you’re working around gluten, an allergy, or a sodium restriction, the shelf gets short fast. Building your own means you decide what goes in.
Dehydrated and freeze-dried are different
The two words get used interchangeably, but they describe different processes with different results on the trail.
A home dehydrator uses low heat and moving air to drive off 90% to 95% of the moisture, which takes 6 to 12 hours depending on what’s on the tray. The food shrinks, darkens a little, and gets dense. Freeze-drying is a different machine entirely. It freezes the food solid, then pulls about 98% of the water out under vacuum without ever melting it, which leaves the structure intact. That’s why a freeze-dried strawberry still looks like a strawberry and a dehydrated one looks like a chip.
The difference is more obvious at dinner. Freeze-dried food rehydrates fast and comes back close to its original texture, so it handles a cold soak well. Food you dried yourself is denser and requires hot water and more time, which is good to know before you plan a stoveless trip around home-dried meals.
Freeze-dried earns its price for ingredients you can’t make at home, such as whole strawberries or shredded chicken.
What dehydrates well
Some foods take to a dehydrator and some fight it the whole way. The reliable ones are mostly water and starch with very little fat.
- Vegetables such as peas, corn, carrots, peppers, zucchini, mushrooms, onions, and green beans
- Cooked grains and legumes, including rice, pasta, lentils, and beans
- Fruit such as apples, mangoes, bananas, berries, and pears
- Lean ground beef or chicken, cooked and drained thoroughly before it goes on the tray
Cucumber, lettuce, and avocado aren’t worth the tray space. The first two are so watery you’re left with a translucent flake, and avocado is too fatty.
Fat is the real disqualifier, since it doesn’t dry at all. It stays liquid, coats whatever it’s on, and turns rancid in storage, which will ruin a batch of meals you spent an afternoon making. That’s why experienced hikers add olive oil on the trail rather than cooking it in at home.
Assembling meals
You can dry the parts and put dinner together at camp, or cook the whole dish at home and dry it as one piece.
The first route keeps your options open. For example, peas and carrots go on one tray, cooked rice on another, browned ground beef on a third, and what comes out is separate bags of each rather than any actual dinners. You decide what combines with what later, standing at the counter with a scoop. That pays off on the trail, too. Hit day nine, sick of burrito bowls, and you’re not stuck with five more, because the beans and the rice and the seasoning were never committed to each other.
The second route tastes better, and the difference is not subtle. A chili that’s simmered an hour has had time for the tomato and cumin and beef fat to find each other. Rehydrate that at camp and you get a chili back. Mix the same ingredients dry and you get rice with chili powder on it. The cost is a choice. If you made six portions on a Sunday in March, you’re eating six portions of exactly that.
Most people land somewhere in between, cooking two or three fresh meals for the nights they’ll want them and keeping loose ingredients to fill in around those.
Follow your dehydrator’s manual for times and temperatures, especially with meat. A batch of jerky that looks done and isn’t will make you sick a hundred miles from a road, and that’s the one step where being careful beats being fast.
Labeling
Every meal goes into its own resealable bag or mylar pouch, and every bag gets four things written on the outside with a permanent marker:
- The name of the meal
- The date you made it
- Water amount
- Soak or steep time
The water amount and the soak time are the two that often get left off, and they’re the two you’ll need most at camp. It’s a bad feeling to be standing there in the dark, too tired to think, holding a bag of couscous and guessing at whether it takes one cup or one and a half. Ten seconds with a marker at your kitchen table solves that months in advance.
Store the finished bags somewhere cool and dark and use them within a season. Mylar with an oxygen absorber tucked inside buys you considerably longer, which pays off if you batch-cook for a whole summer at once.
How Nalgene Fits Into Your Ultralite Cooking System
A stove, a pot, a measuring cup, a bowl, and a spoon each do one job.
Here’s what a wide-mouth bottle handles over the same trip:
- It carries water, which is why it’s in your pack in the first place
- The printed graduations turn it into a measuring cup at home
- It’s the cold-soak container, sealed tight enough to ride in a pack full of down
- It’s the shaker for sauces, drink mixes, and protein powder
- It’s the bowl you eat soaked meals out of
Stove or no stove, there’s a Nalgene built for how you cook. The 32 oz Ultralite weighs 3.75 ounces and covers that whole list, which is a fraction of what a stove setup costs you. The Tritan Wide Mouth is heat safe, so boiling water goes straight in for coffee, oatmeal, or a hot dinner. Both take the same lid, both are marked in ounces and milliliters, and both survive a drop on rock. Our storage containers handle the spices and powders that would otherwise get into everything else.
Cleanup is quick either way. Splash a little water in, shake it hard, and drink it, since those are calories you already carried up there. Otherwise scatter the contents well away from camp and any stream, and pack out anything solid.
Day one will always be the heaviest day. It just doesn’t have to be as heavy as last time. Weigh the bag, strip the boxes, label the soak times, and portion the powders before you leave, and that first climb stops being the price you pay for the rest of the trip.
Ultralite Camping Frequently Asked Questions
What is the 20% rule for backpacking?
The 20% rule for backpacking holds that total pack weight, food and water included, should stay at or below 20% of body weight. For a 160-pound hiker, that equals 32 lbs. Treat it as a ceiling rather than a goal, and remember that food weight drops every day while base weight never does.
Is it safe to cold soak backpacking food?
Yes, it is safe to cold soak backpacking food so long as you watch the timing and the ingredients. The USDA puts the limit for food held between 40 and 140 degrees at two hours, or one hour above 90 degrees. Soak plant-based bases like couscous, potato flakes, and bean flakes through the afternoon, then stir in a tuna or chicken packet right before you eat. Always soak with filtered water.
How should you store food overnight while backpacking?
While overnight backpacking, you should store all food, trash, and anything scented well away from where you sleep, using either a bear-resistant container or a hang. Many national parks and wilderness areas now require the container. Where hanging is still permitted, requirements range from 12 to 15 feet off the ground and 6 to 10 feet out from the trunk depending on the area. Check the rules where you’re headed before you go.
How long does homemade dehydrated backpacking food last?
Homemade dehydrated meals keep about one to two months in a resealable bag stored somewhere cool and dark. Vacuum-sealed mylar with an oxygen absorber extends that to six months or longer. Toss anything that smells off or feels soft or greasy, which usually means fat was left in the mix and has turned.
How do you eat cheaply when backpacking?
You can eat cheaply when backpacking, especially when you prepare your own meals. Grocery store staples cost a fraction of freeze-dried pouches. Instant potatoes, ramen, pasta sides, couscous, and instant rice cost about a dollar per dinner. Buying those bases in bulk rather than by the box cuts it further, and on long trails, hiker boxes at resupply points hold food other hikers left behind, free to take.